In this guide I will be walking through the process of setting up a droplet from your own windows computer, using DigitalOcean's API tool Doctl.
Knowing how to do this may help you automate certain processes such as setting up testing environments or servers on demand.
Download doctl
Go to doctl's official github page.
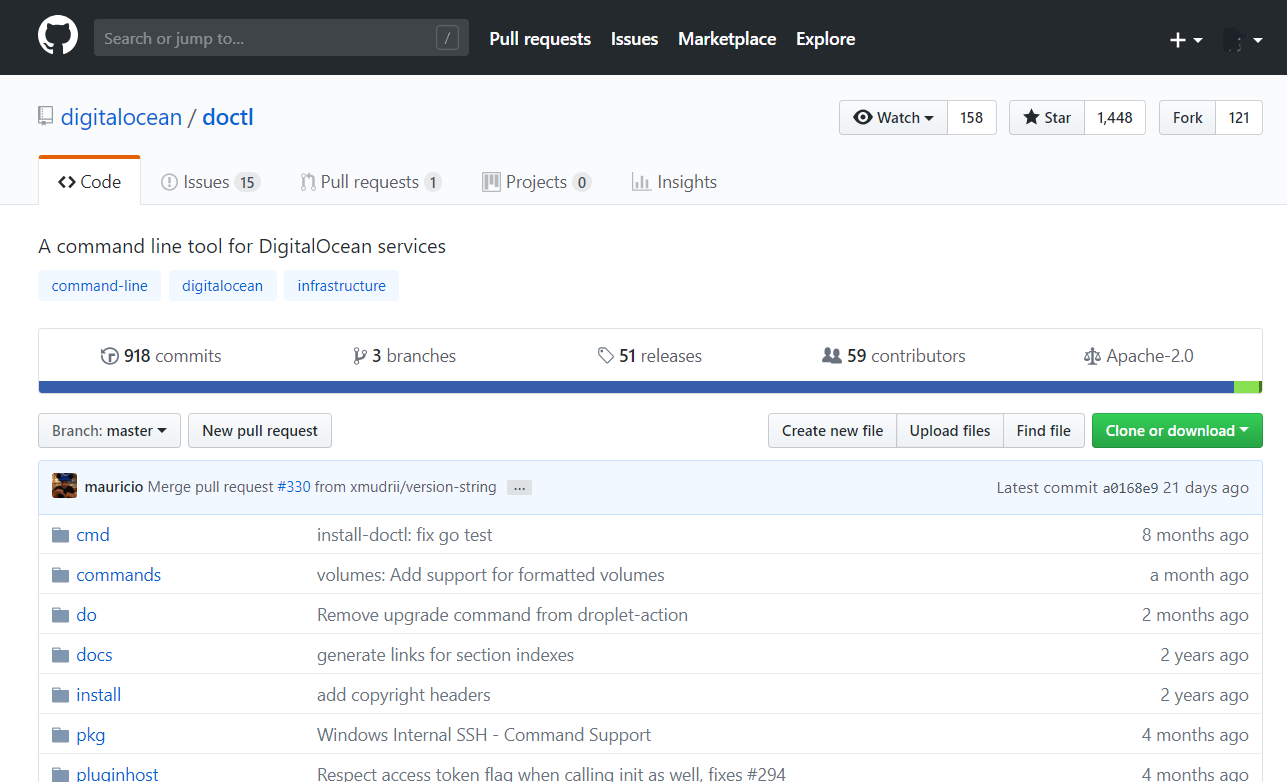
Select the releases tab.

We will have to choose the windows version that match our own CPU.
If you are running on a computer with an AMD CPU (64bit), select doct-1.8.3-windows-4.0-amd64.zip (or whichever version is current).
If you are running on an intel computer (32 or 64bit), select doctl-1.8.3-windows-4.0-386.zip (or whichever version is current).
Do I use Intel or AMD?
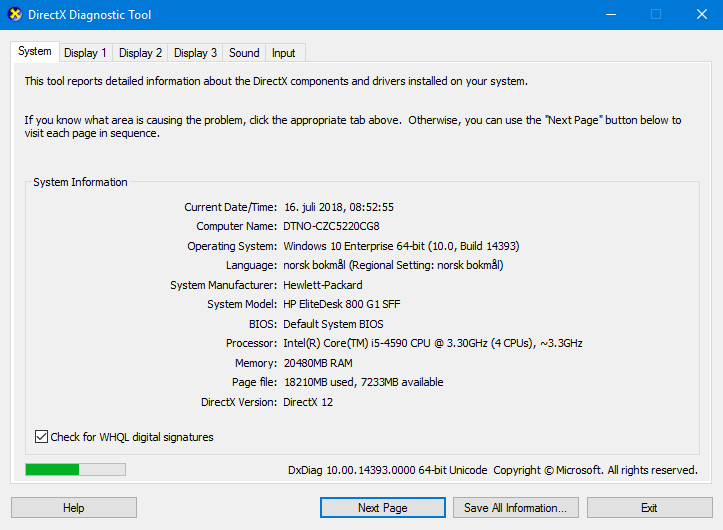
If you do not know whether you are running on an AMD or Intel CPU, open up the start menu and enter dxdiag.
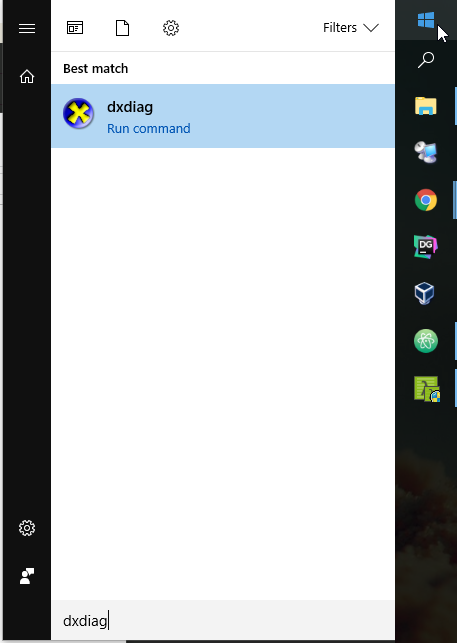
The first time you run it, it is going to ask if you would like to check if your drivers are digitally signed. Confirm it.
Here you should be able to see whether or not it says AMD or Intel(R) next to Processor. In this example I use an Intel CPU.
Install and setup doctl
After you have downloaded the appropriate zip file, extract the contents to a folder of your choice. I would recommend you rename it and put it under C:/doctl/ for ease of access. Whichever path you choose, make sure you keep using your own path throughout the examples.
Next we want to make sure we can access the doctl.exe file from any location via the command line or powershell by adding it as a system path environment variable.
How to setup the System Environment Variable
1. Via the Start Menu, search and open Edit the system environment variables.
2. In the Advanced tab, press the Environment Variables… button.
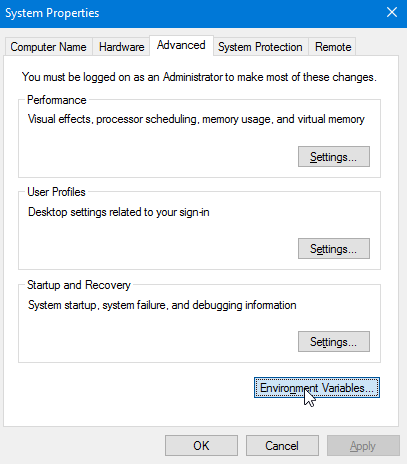
3. Double-click the Path variable in order to open it.
4. Select New and enter the path to the folder: C:\doctl
5. Reopen powershell or terminal if i already was open in order for the changes to take effect.
Getting your API Token from Digitalocean.com
An API token is a randomly generated value generated by digitalocean, that will act as your secure password and ID for interacting with the digitalocean API via doctl.
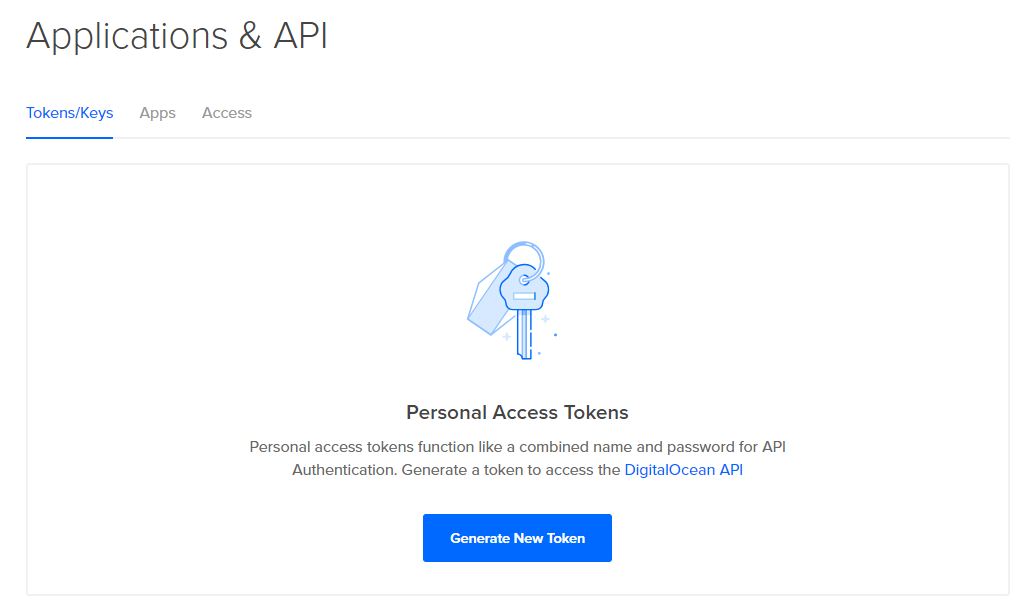
Start by logging in to your DigitalOcean account, and go to your API page.

Make sure you are in the Tokens/Keys tab and select the huge Generate New Token button in the middle.
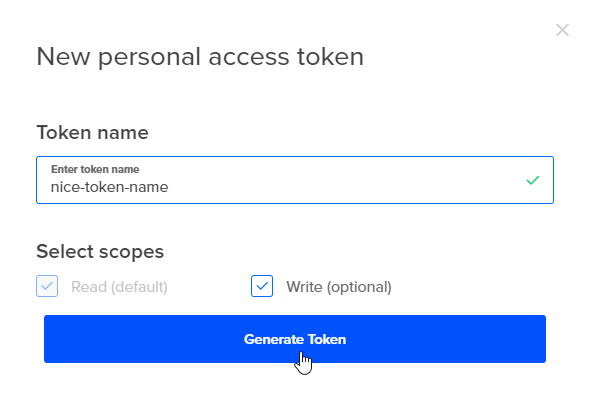
A popup will show up, and ask you for a Token name, as well as whether or not to give it Write access. Leave it as is, and give it a recognizable and nice token name. Select Generate Token.
A new entry should have been added, and below the nice token name, you should see a long string.
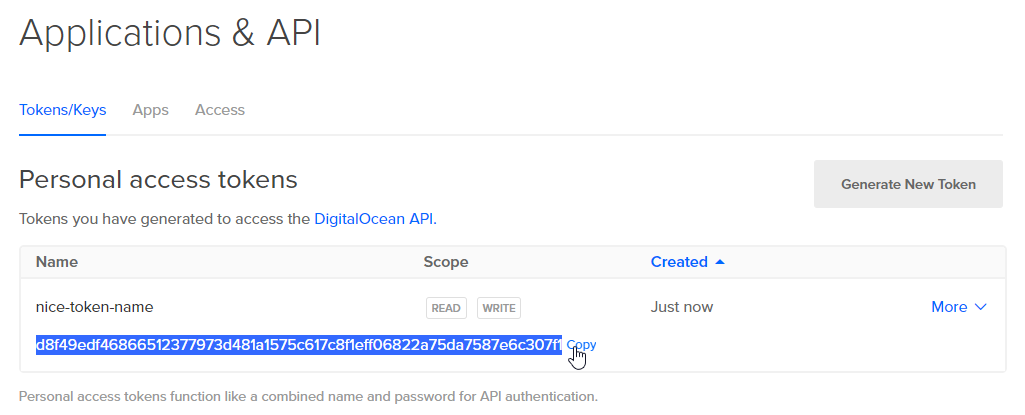
Copy the string, either by doing it manually or pressing the invisible Copy button to the right of it. Make sure you store it somewhere secure.
Now we have our token to use with doctl.
Authenticate yourself in Doctl
Open up your favorite command prompt and enter:
doctl auth init
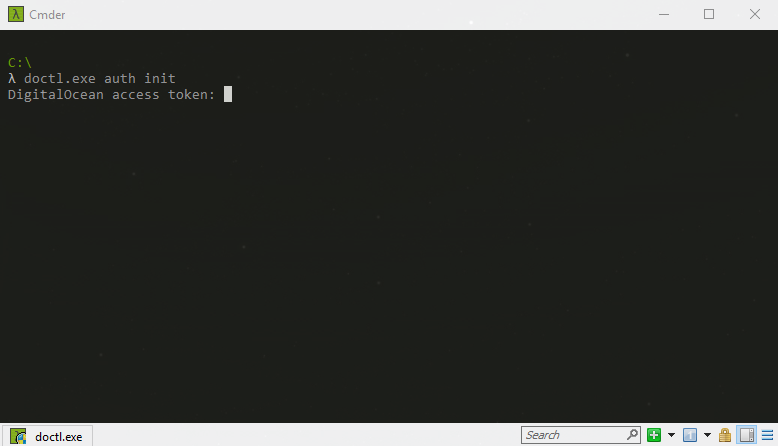
It will then ask for your digitalocean access token.
Make sure you do not have any trailing white spaces when copy-pasting the token from the previous section.
We are now ready to enter the appropriate commands to create our very own droplets from the command line.
Creating the Droplet
Before we can create a droplet, we need to figure out where we want to host it, what type of image (OS) we want to run it on, and the size of the droplet.
The pattern of the command we are going to use looks like this:
doctl compute droplet create <name> --region <region-slug> --image <image-slug> --size <size-slug>
Picking a region
Let us begin by figuring out which region we want to host the droplet in. We can get a list of available regions by typing in the following command:
doctl compute region list
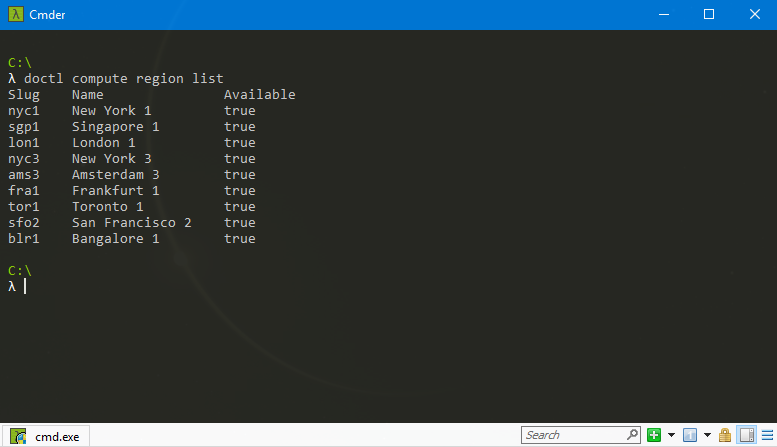
Here you can choose the slug for the region you wish to use. For this example, I will pick "London 1", which has the slug name of lon1.
Picking an distribution / application image
We can choose whether or not we want use a clean distribution image, or a ready-to-go application image such as Docker, GitLab, LEMP, and so on.
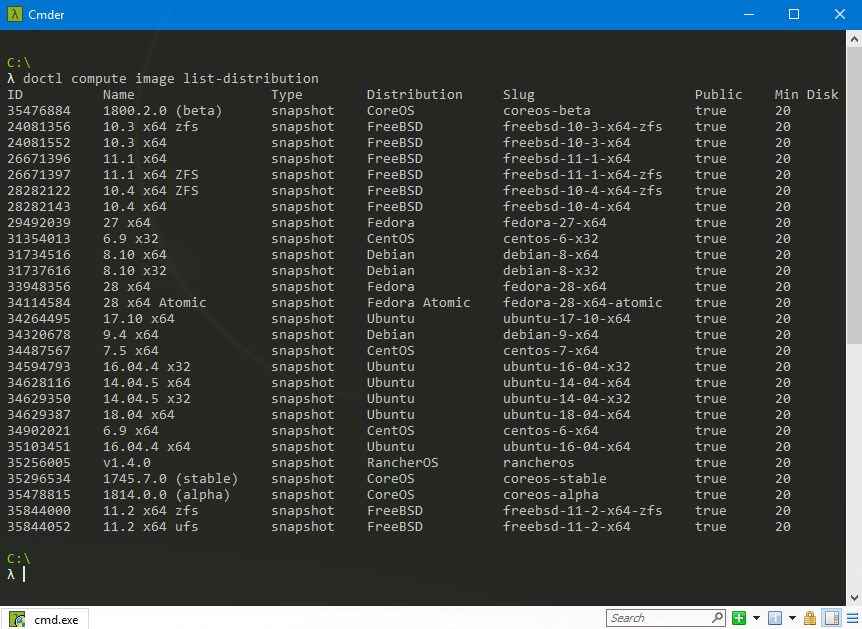
You can list the available distribution images by entering:
doctl compute image list-distribution
You can list the available application images by entering:
doctl compute image list-application
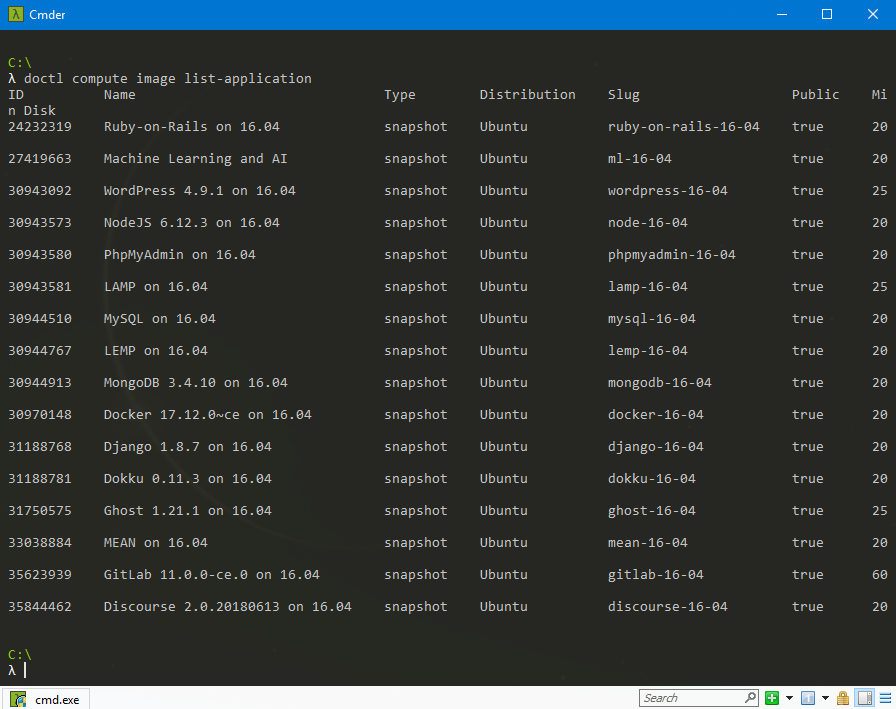
As we did with the region, choose the appropriate slug matching the image of your choice. For this example I will use the CentOS distribution image, which has the slug name centos-7-x64.
Choosing a droplet size
In order to list available sizes, we can run:
doctl compute size list
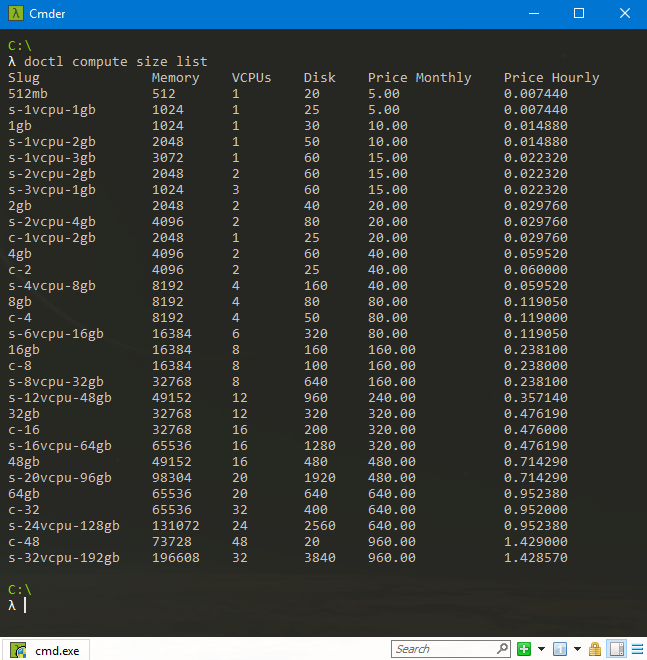
I will choose the cheapest one with a slug name s-1vcpu-1gb.
Creating the droplet
Now that we have our slug for region, image, and size, we can create our image from the command line.
region: lon1
image: centos-7-x64
size: s-1vcpu-1gb
Choose a name for the droplet, and fill in the blanks.
doctl compute droplet create <name> --region <region-slug> --image <image-slug> --size <size-slug>
I will name my droplet my-droplet and fill in the rest. This gives me a full command that looks like this:
doctl compute droplet create my-droplet --region lon1 --image centos-7-x64 --size s-1vcpu-1gb

The login information for your droplet should be sent to your email associated with your DigitalOcean account.
You should now be running your very own Droplet, created from command line using Doctl.
Visit your DigitalOcean dashboard, under the resources tab, in order to view your new Droplet information.